How to Create Load using TruckLogics Mobile App?
379 views |
Last modified 10/14/2024 9:18:35 AM EST |
Added by TruckLogics Team
Create Load using TruckLogics Mobile App!
You can now create load on the go with the TruckLogics mobile app.
This article will explain the steps involved in creating the load using the TruckLogics mobile app.
Note: This option will be only available for iOS and Android mobile apps.
- Overview of Load List Pag
- Overview of Create Load Page
- Step 1: Add customer
- Step 2: Add Shipper and Consignee
- Step 3: Add Miles
- Step 4: Add Freight Details
- Step 5: Add Charges
Overview of Load List Page
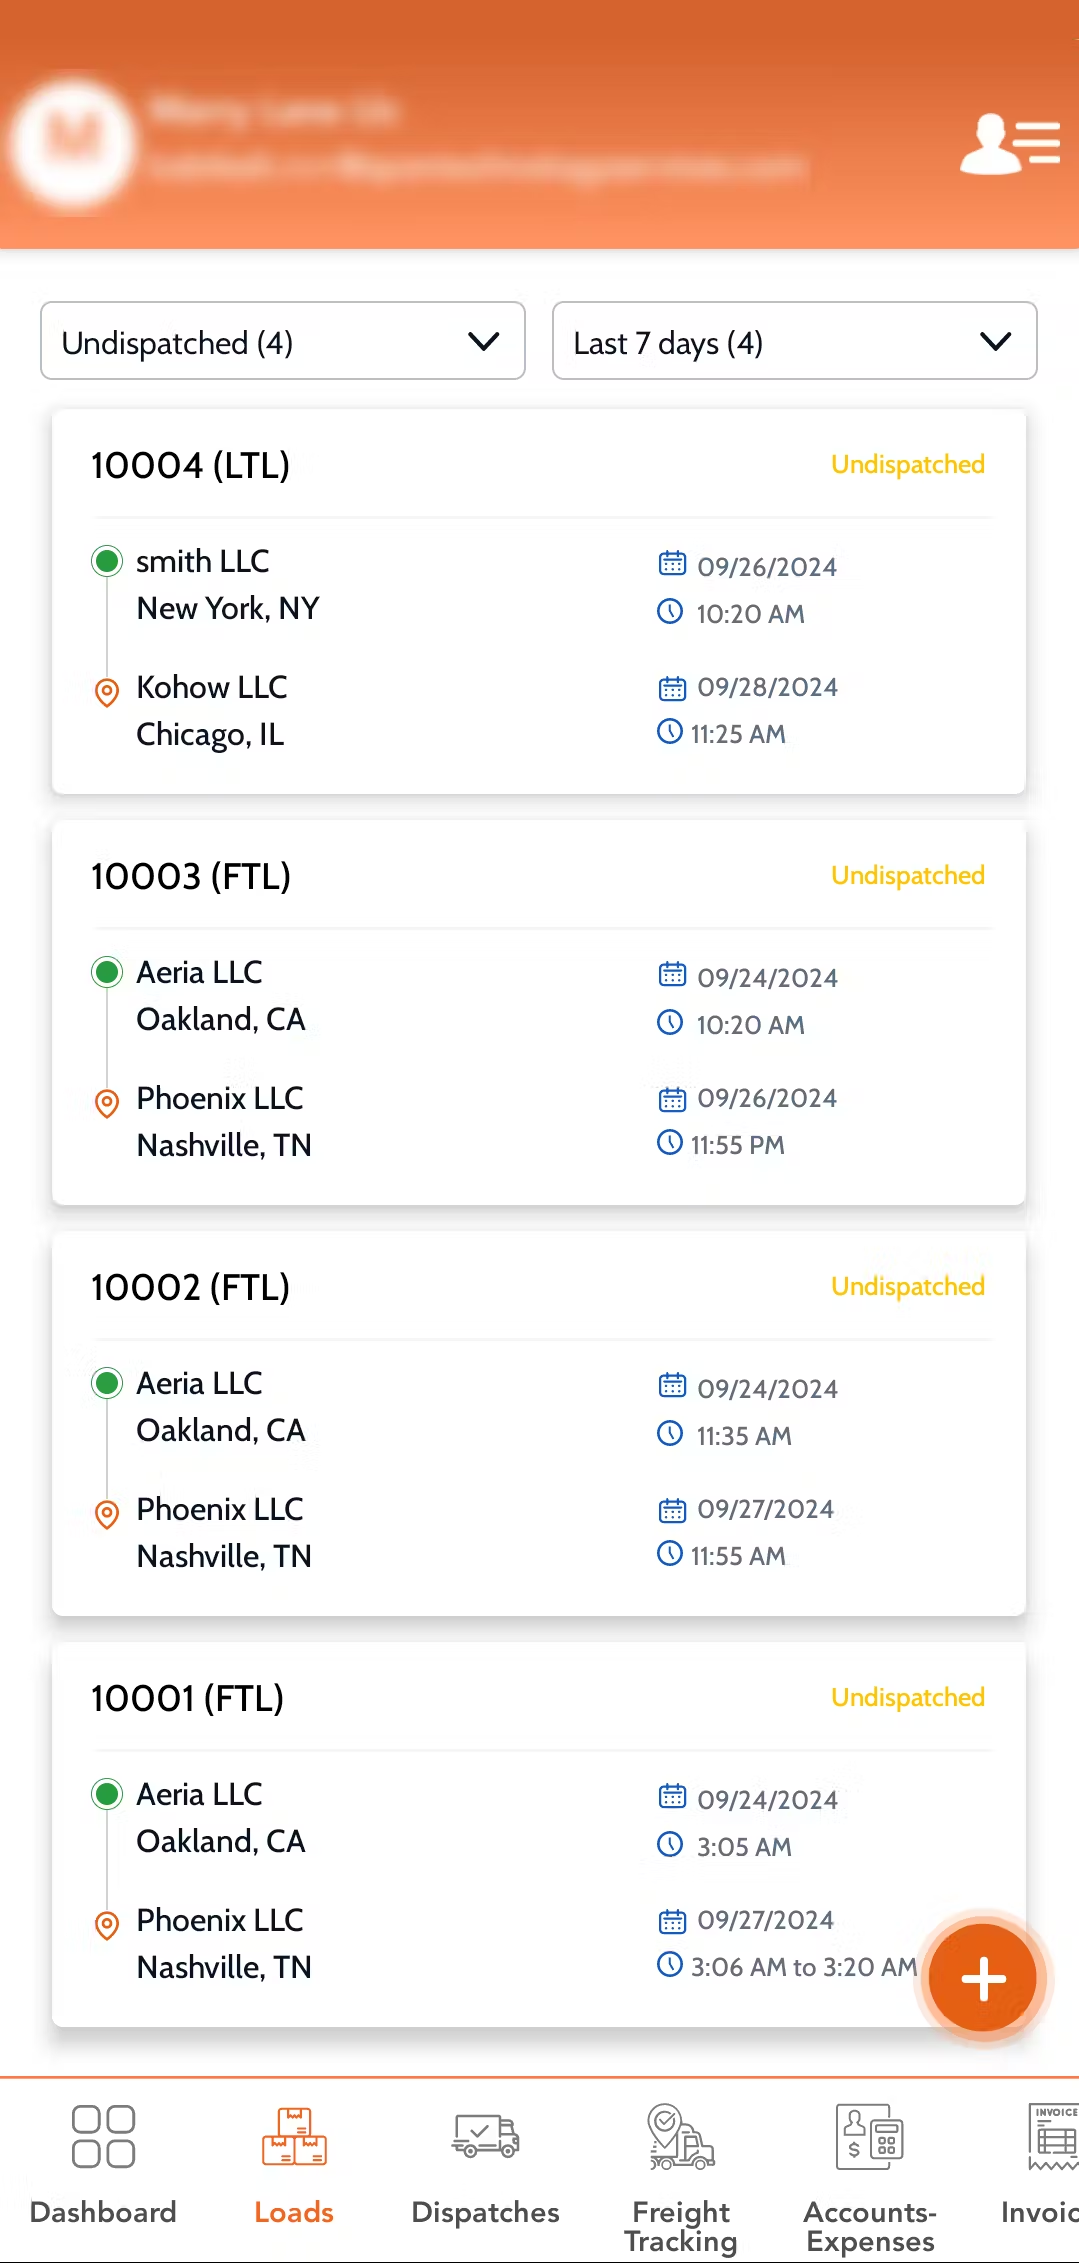
Keep track of the loads created from the mobile app and also through our website.
You can view loads of statuses “Draft”, “Undispatched”, and “Active” for the last 7 days and 30 days.
Click on the respective load to view the summary or edit the information if required. You can complete creating the loads that are in “Draft” status.
Click the “+” icon to create a new load!
Overview of Create Load Page
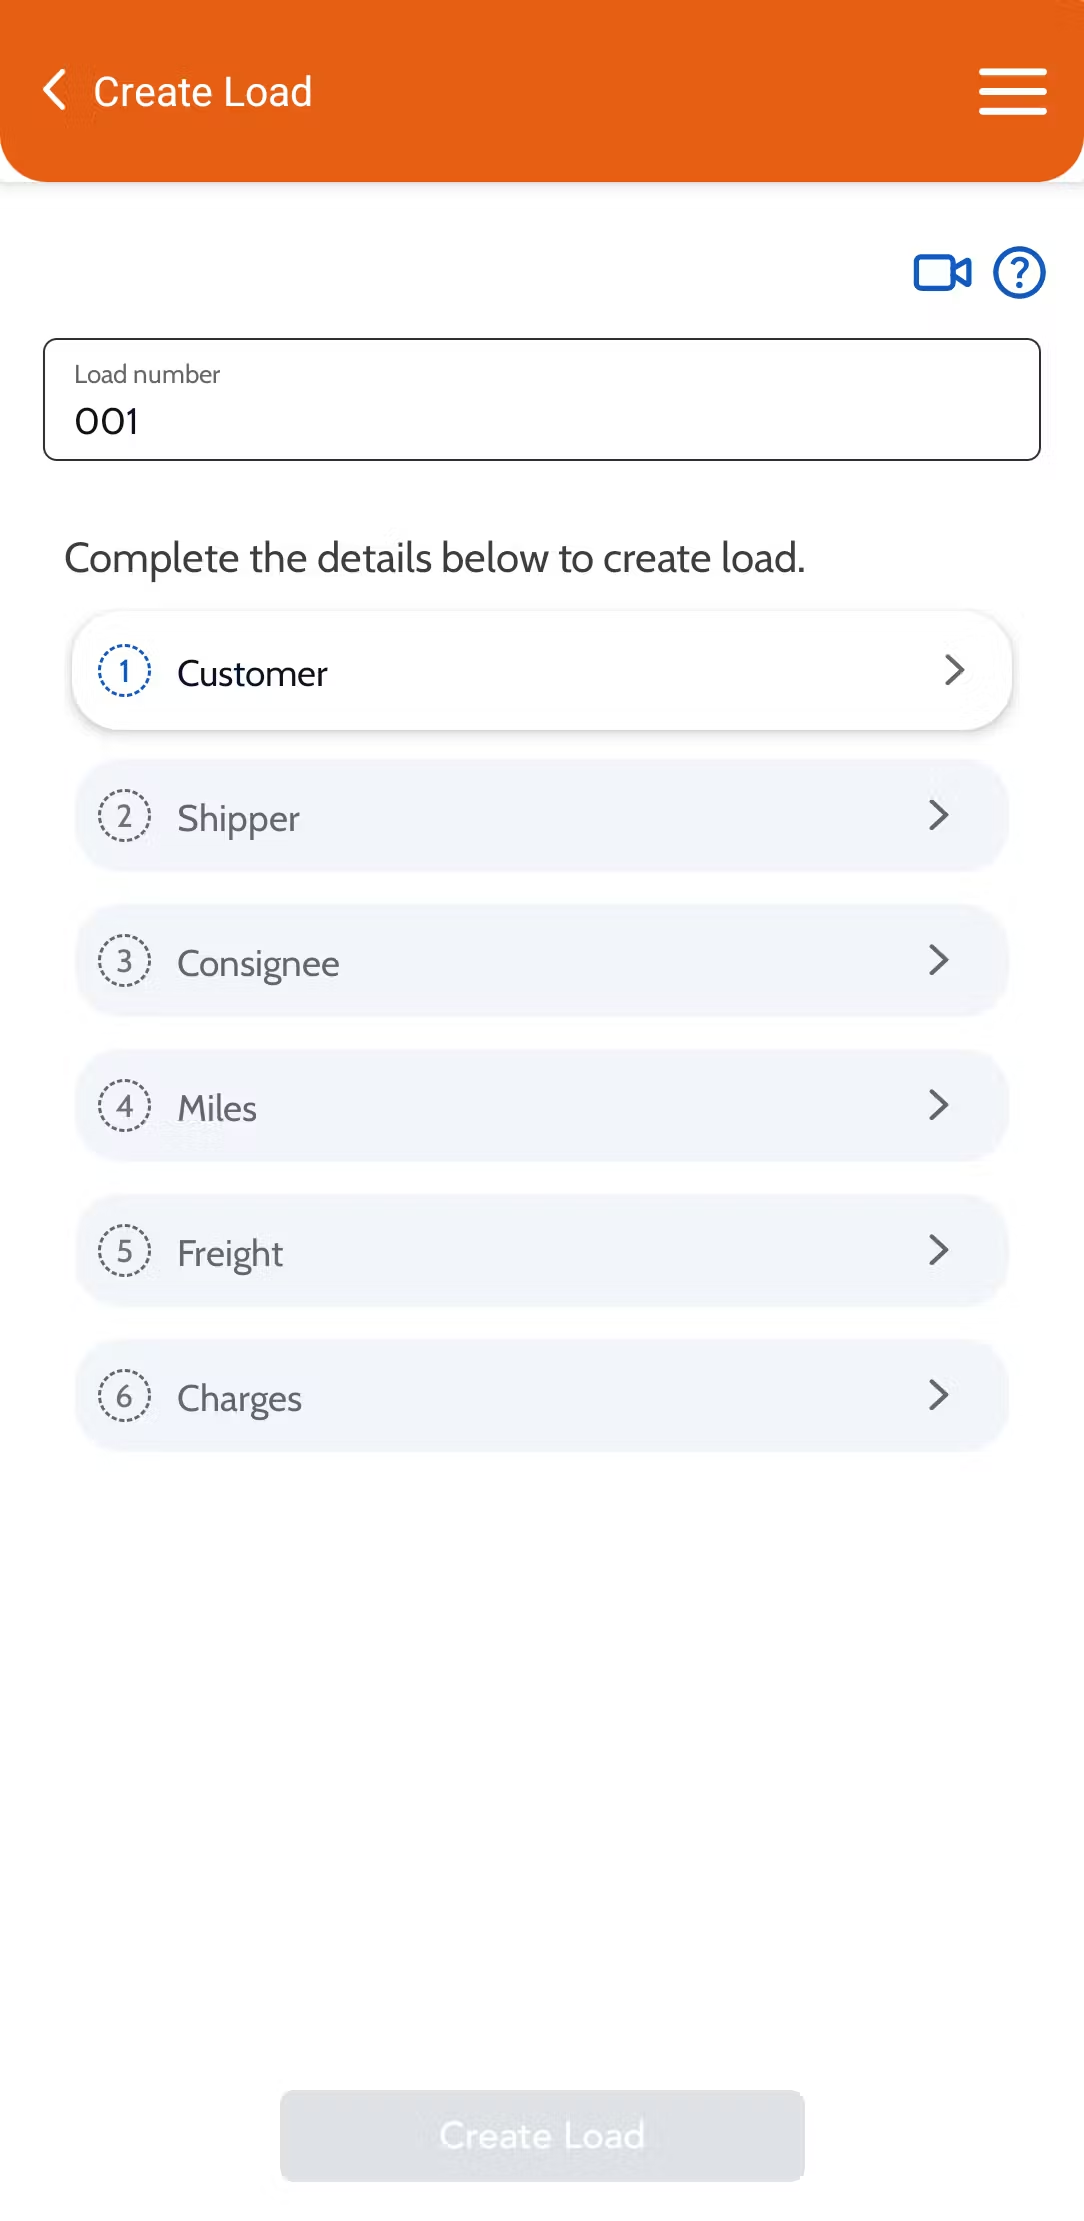
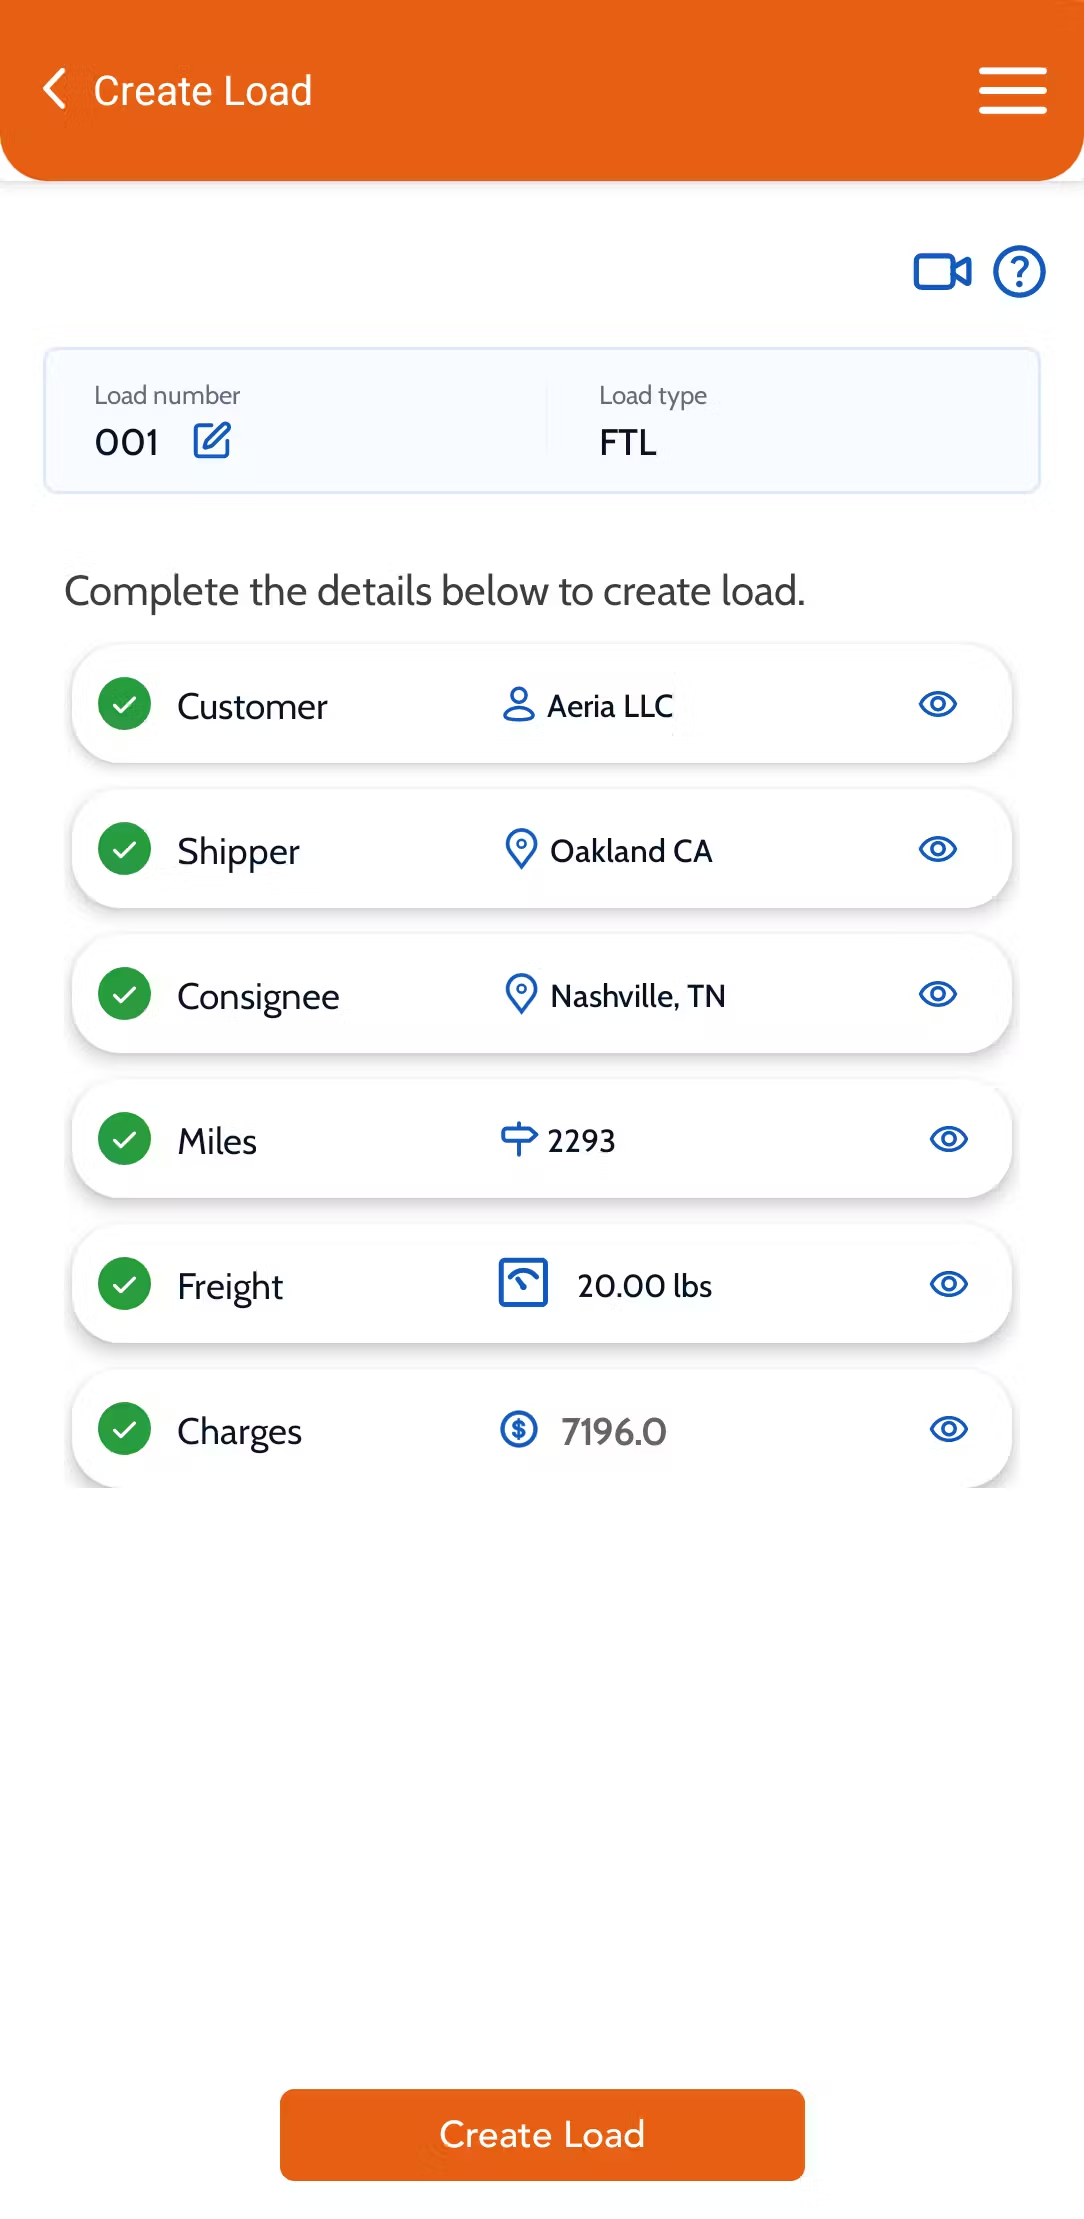
The load number will work based on the preference that you chose on the website. If it is an automatic number, the number will be added automatically, and if it is manual, you can enter it manually as required.
To get started with creating the load, you can click on each section and add the required information.
Customer, Shipper, Consignee, and Charges are mandatory to create a load.
Once you add the customer and click “Save and Continue”, your load will be in “Draft” status which you can always come back and add other information whenever required.
- Enter Load Number: Start by entering the load number to unlock the modules.
- Add Load Information: Fill out all the required fields in each section
- Preview: Before finalizing, click the <eye icon> to preview the entered information. Ensure everything is correct, and click “edit” to make changes if required.
- Create Load: Once you have verified everything, click "Create Load" to complete creating the load.
Follow the steps below to create a load using our iOS and Android app.
Step 1: Add details of the customer for whom the load is being created for.
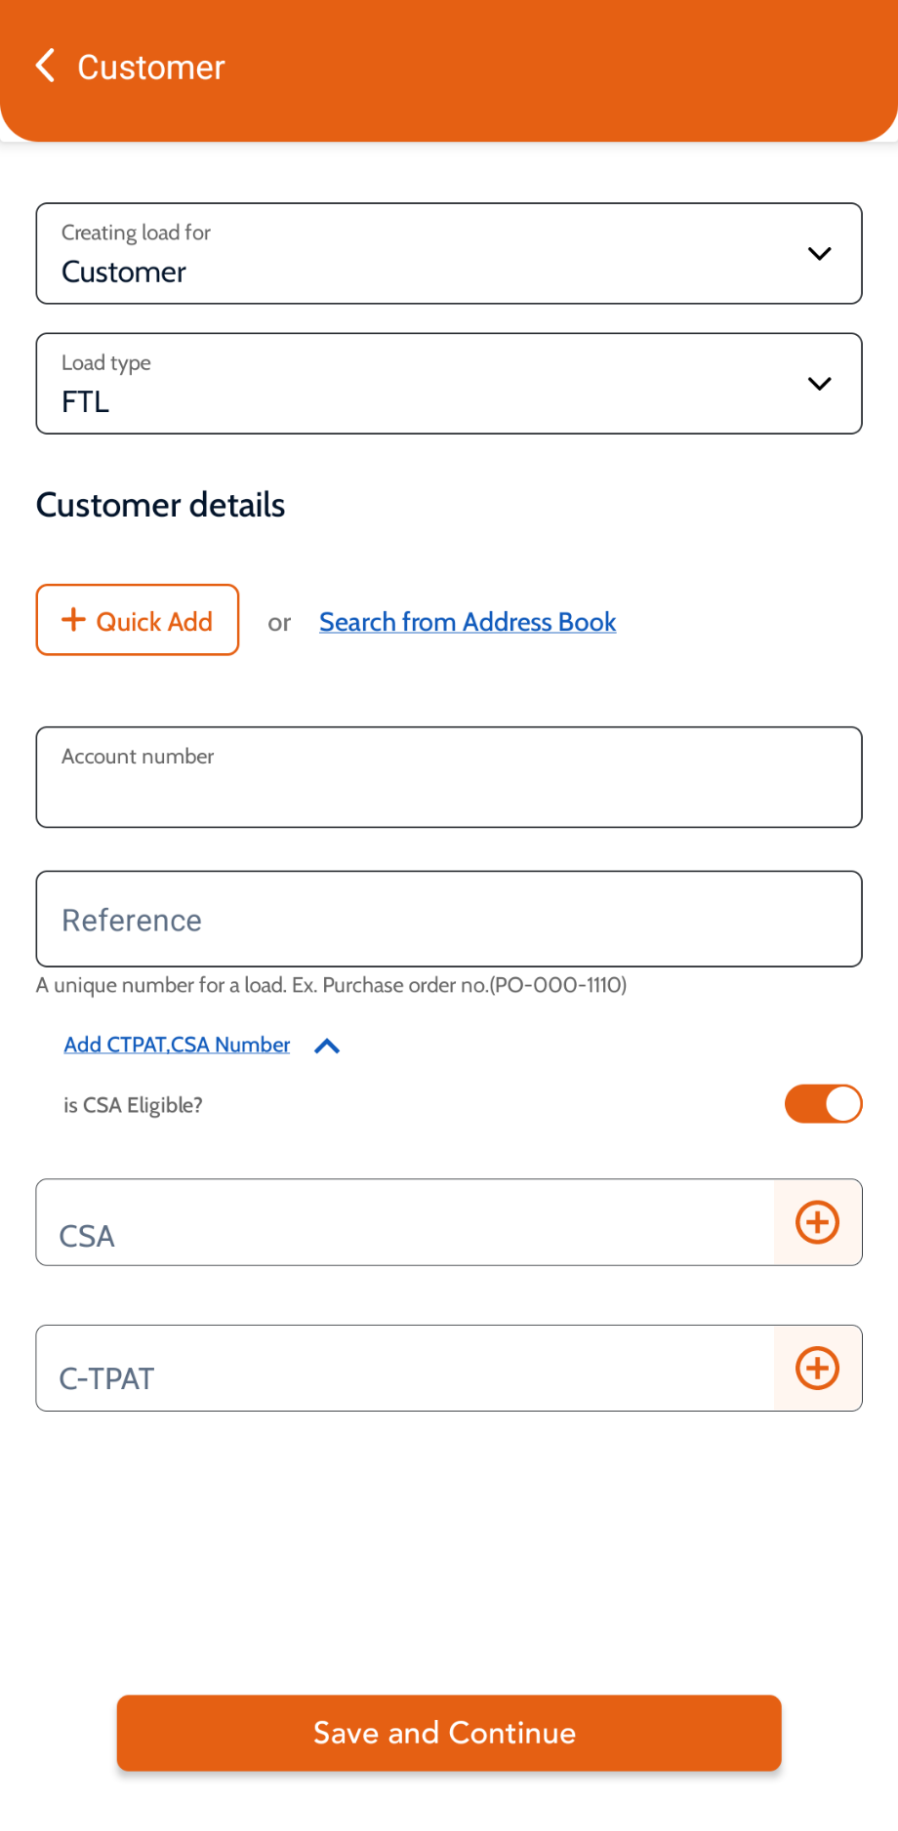

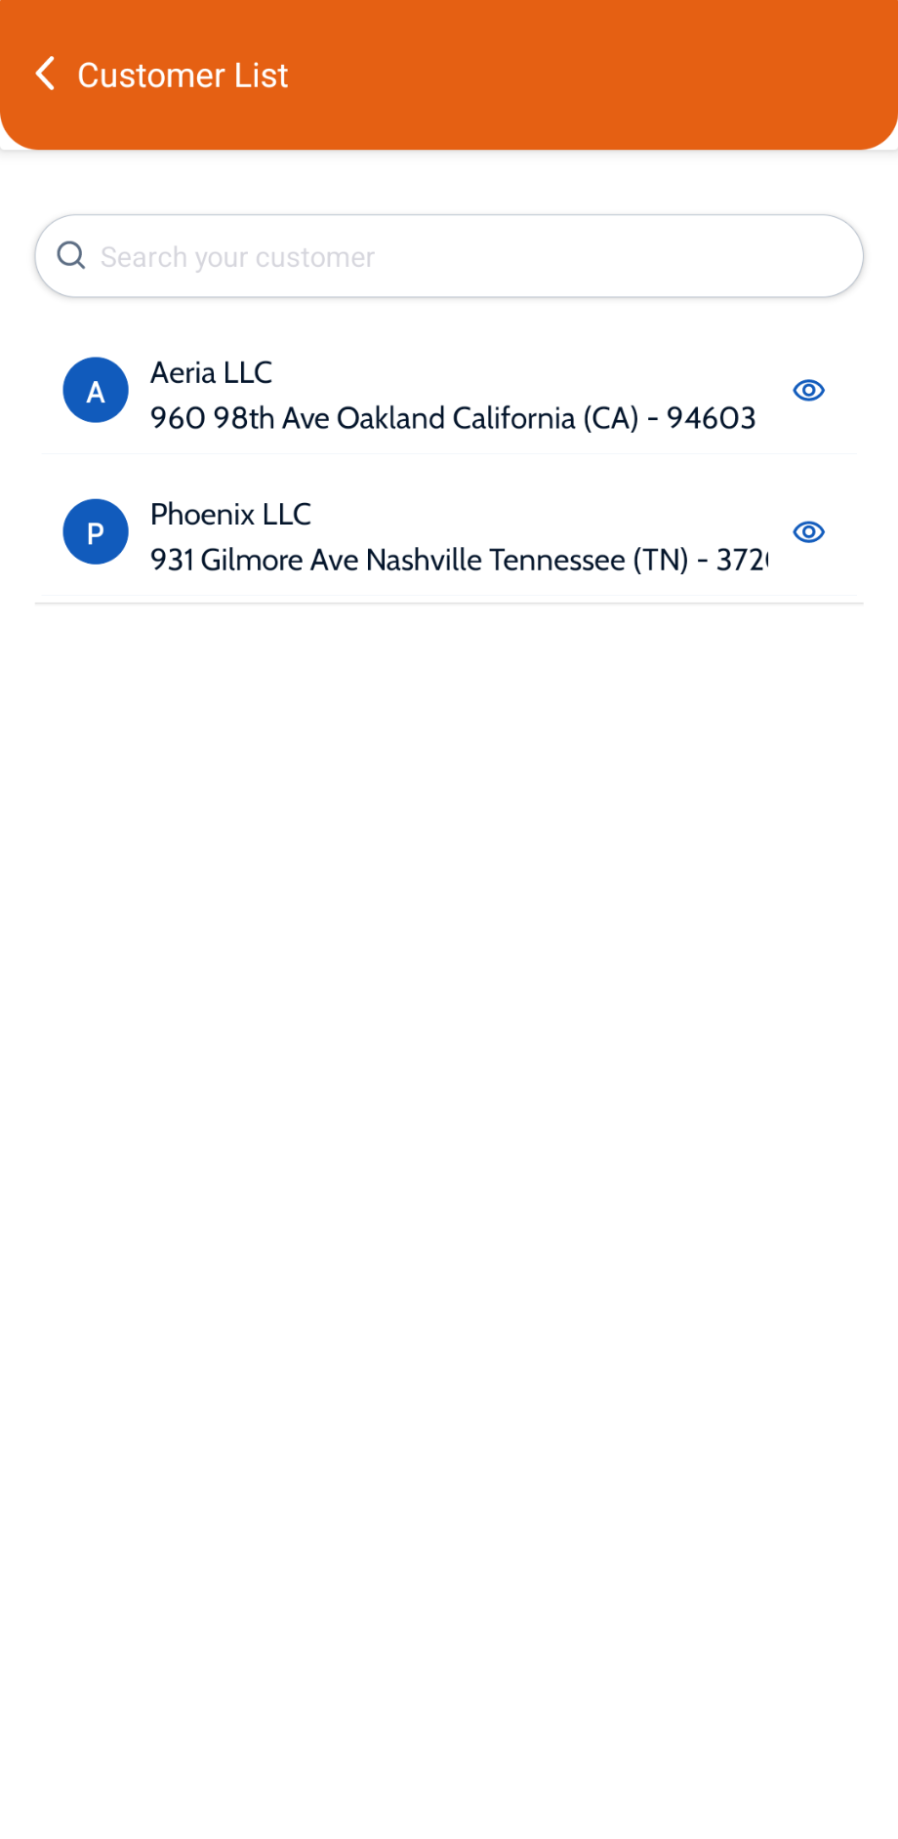
Select the load for whom it is for and the load type.
Quick Add a new customer or search from the Address Book to select an existing customer.
Additionally, you can
- Enter the account number associated with the customer and a unique reference for this load if required.
- Add C-TPAT, CSA Number if your load requires customs information.
Step 2: Add the Shipper and Consignee details with the required information

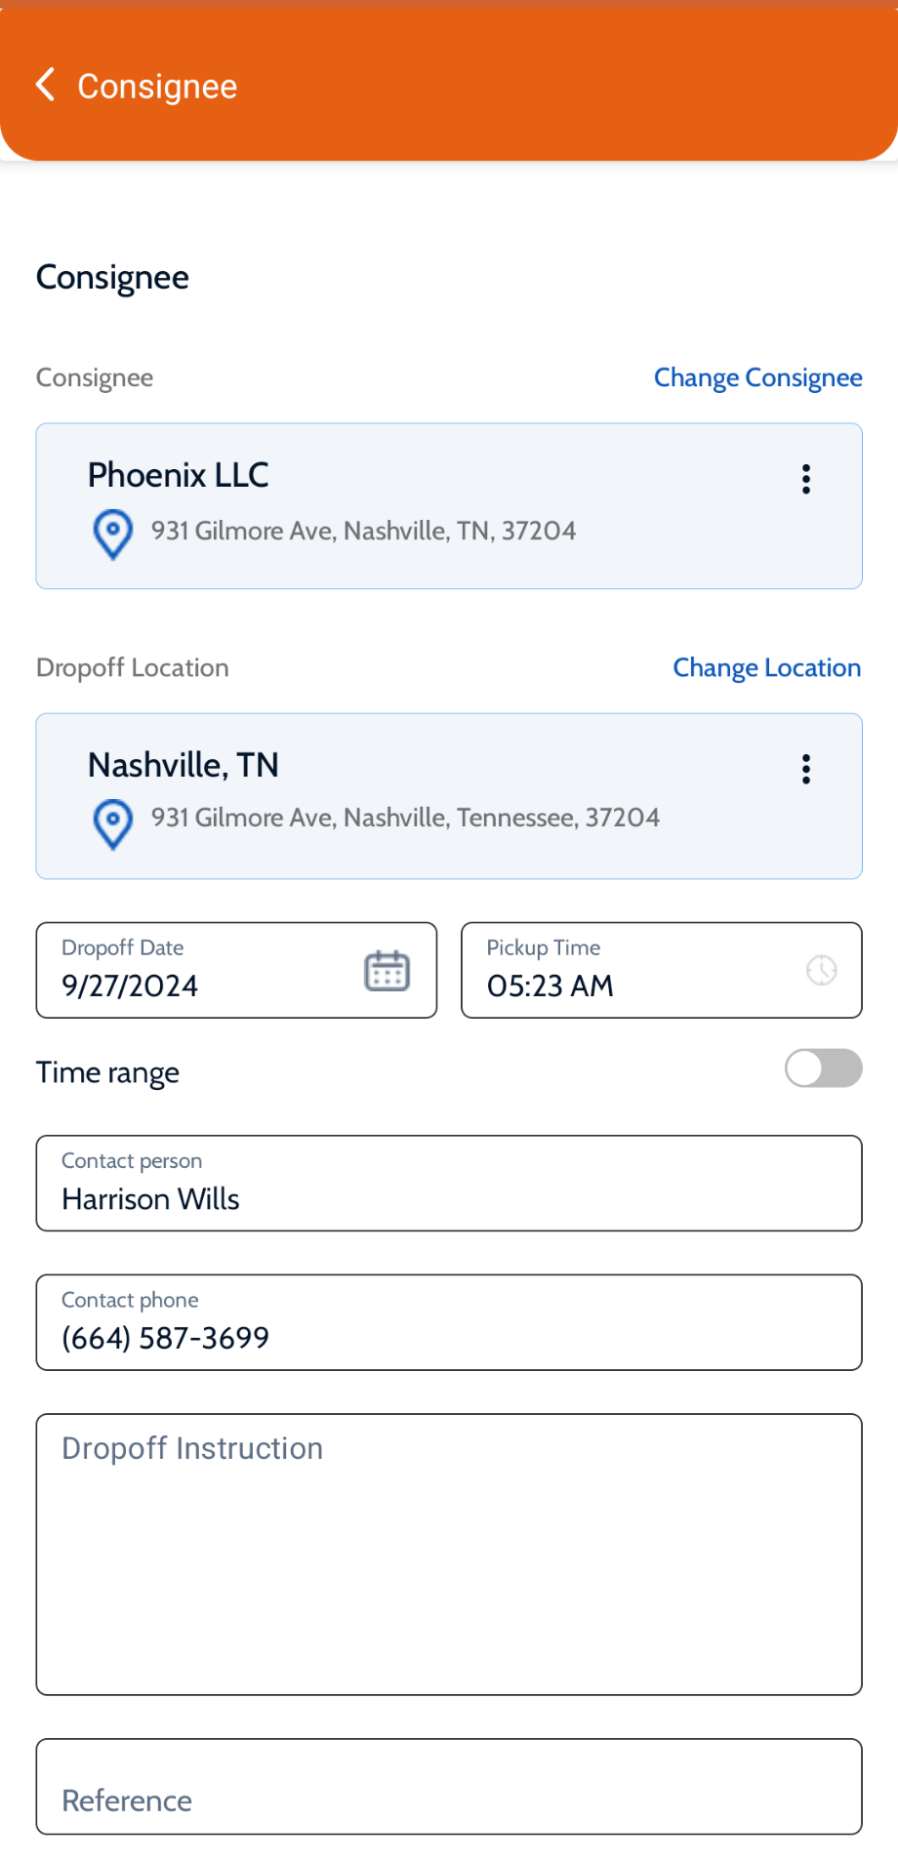
You can Quick Add a new customer or search from Address Book to select an existing customer as a shipper here.
Check the toggle button to see if the shipper is the same as the customer to fetch the customer information into the shipper automatically.
Adding Pick Up and Drop Off information
Location: If you have multiple locations for the same customer, select the pickup or drop-off location from the drop-down, or you can quickly add it if required.
You can add locations by
- searching from Google
- Entering Lat, Long
- Entering Plus Codes
- Add manually
Click here to see how to add location using the above options.
Date and Time: Add the desired pickup or drop off date and time. You have an option to select the exact time, and also can specify a time range if required.
Contact info: Add the contact person for the pickup and drop off with the phone number to ease the communication for your driver.
Instructions to driver: Provide any special instructions related to the pickup and drop off in the instructions field.
Notes to Your Team: You can also add notes specific to the load or customer which will be visible to your team (Office Manager, and Dispatcher except driver).
Add any Reference numbers or the Bill of Lading in the BOL text field.
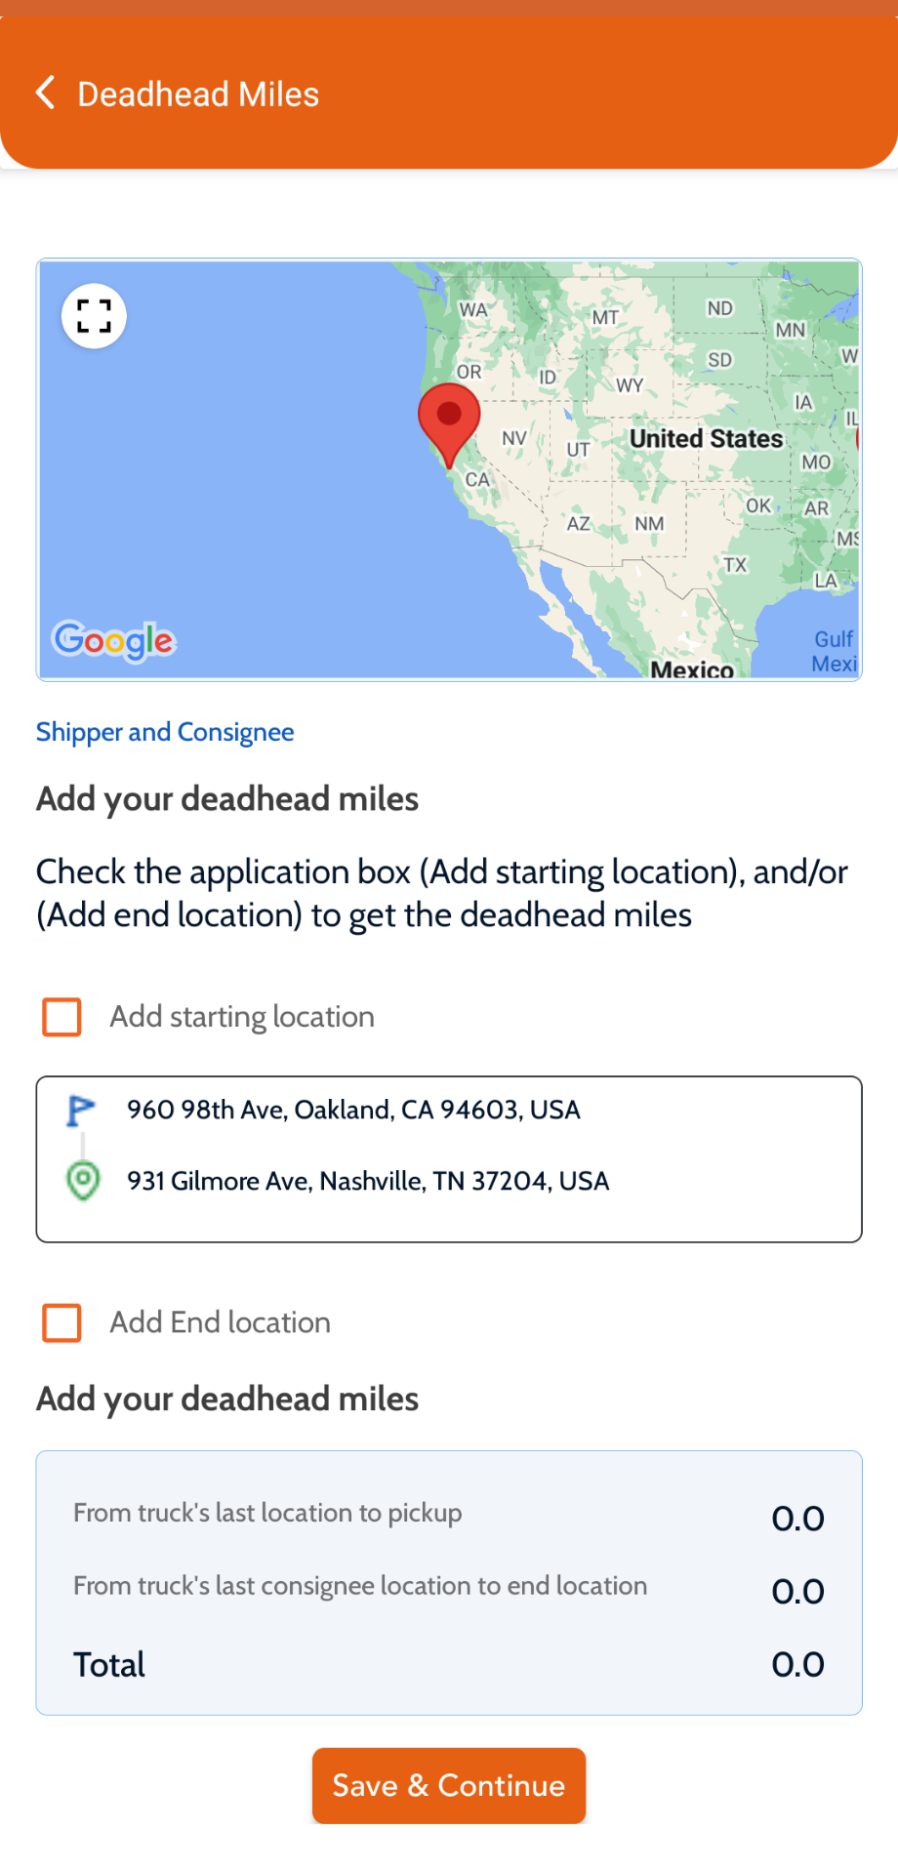
Step 3: Find the distance between the shipper and consignee for the load, and add deadhead miles if required.
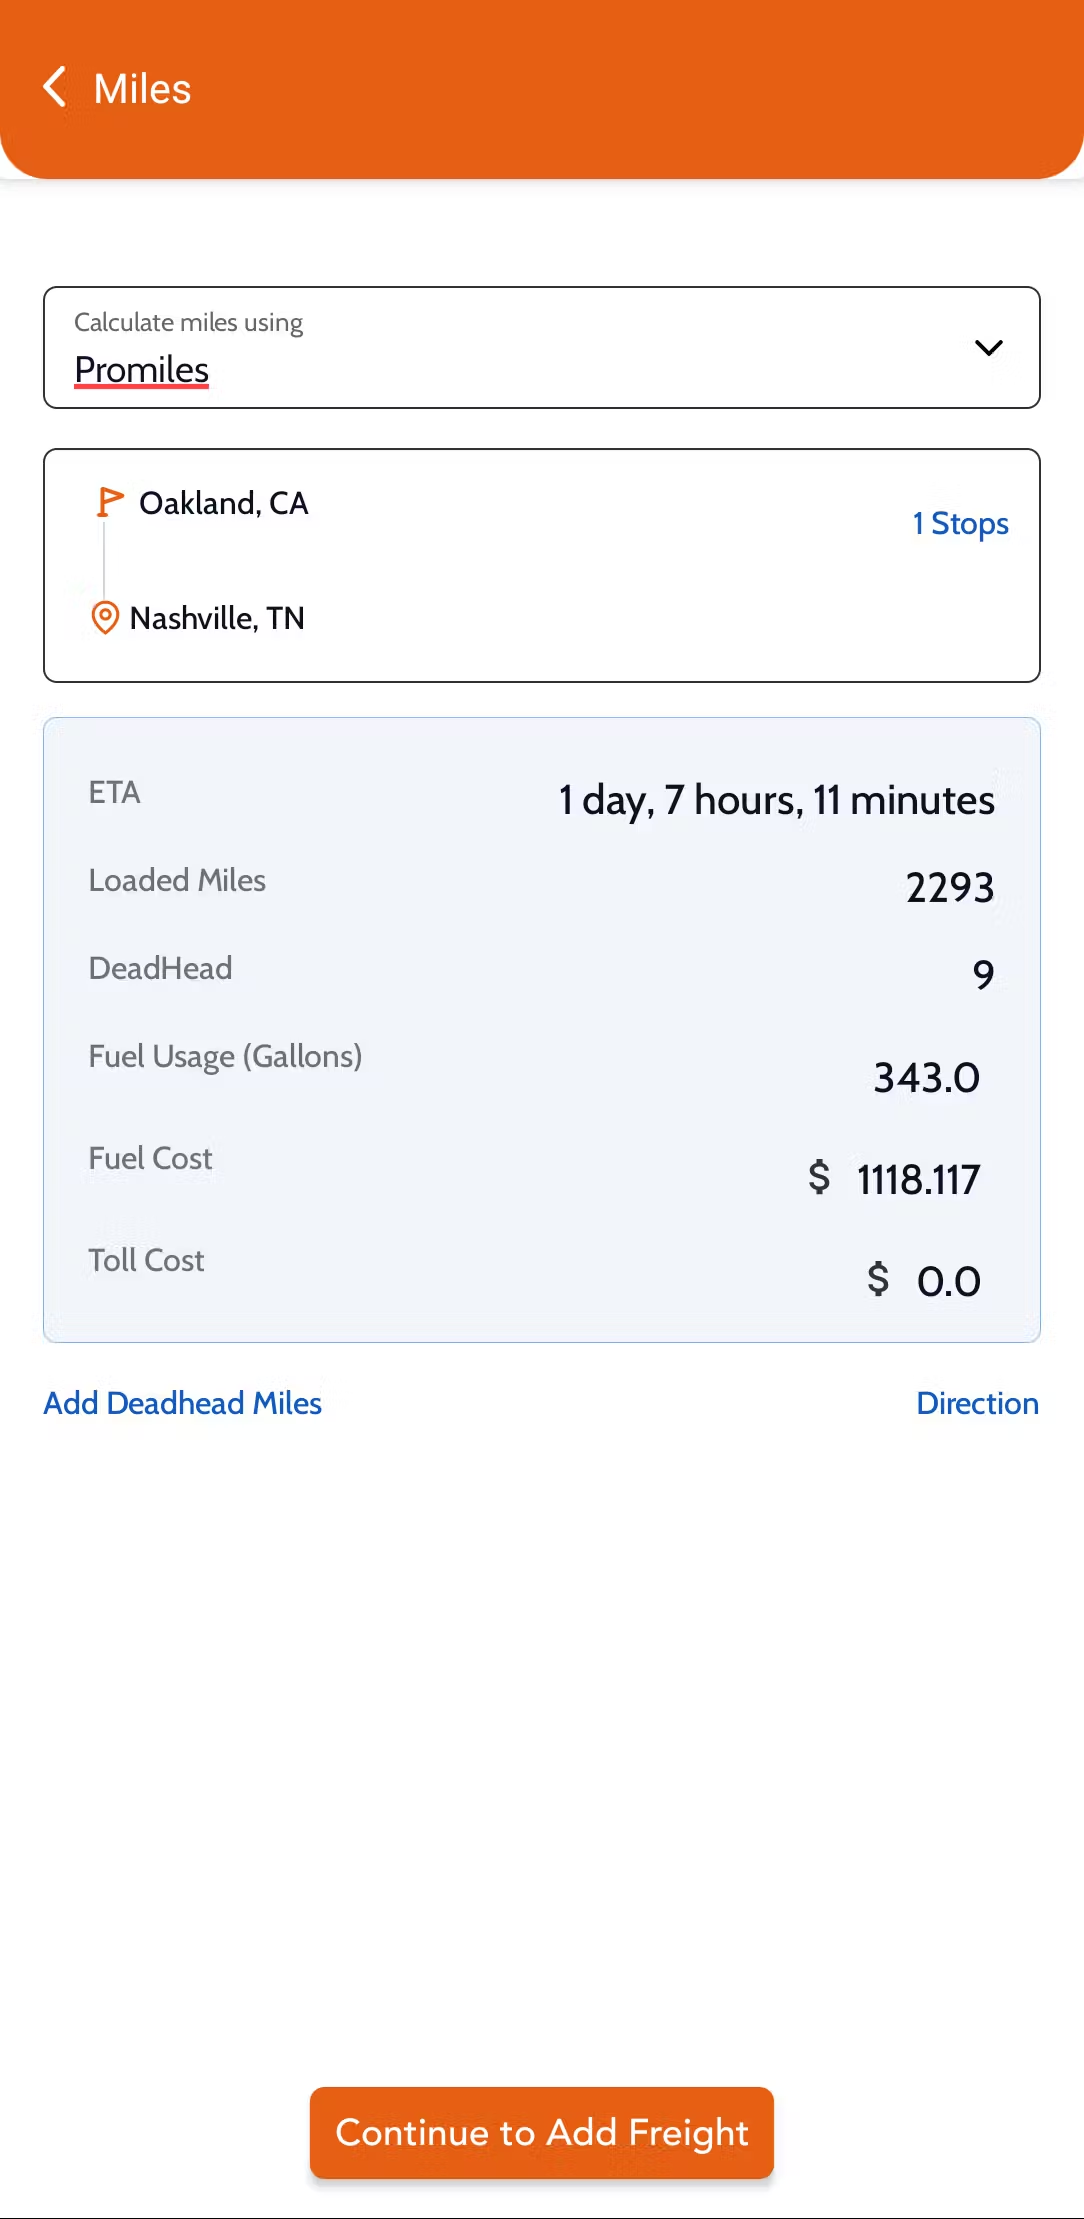
You can calculate miles using Google Maps, ProMiles, or enter it manually.
You will be able to see the total miles with the ETA. Additionally when you choose ProMiles you can view an Estimation of Fuel required with Cost, and Toll Cost.
You can also Add Deadhead Miles if required which are calculated based on the start and end locations that you provide. These deadhead miles will be fetched in the charges section.
Step 4: Add the details of the Freight that are being carried
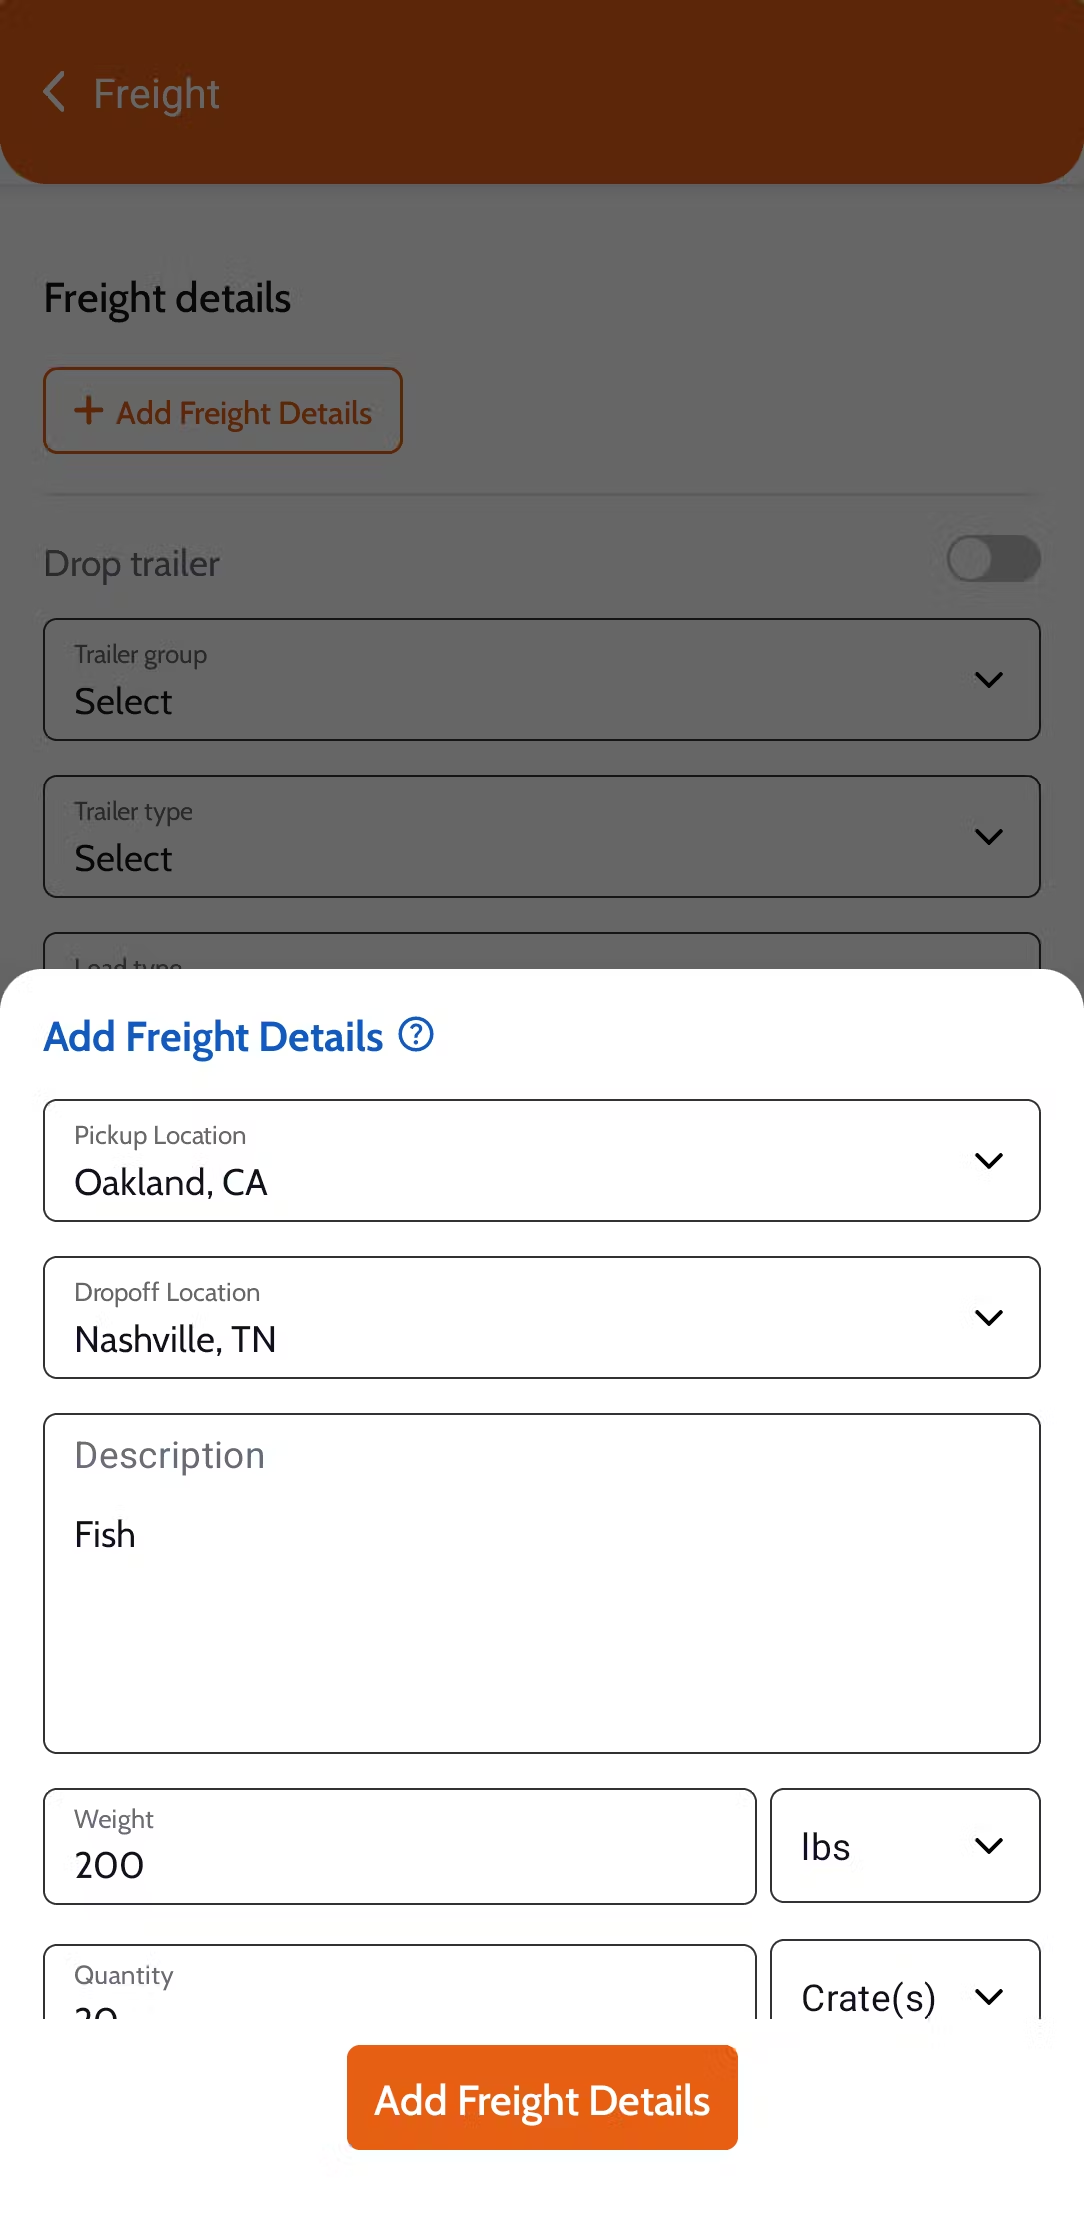
Enter description, weight, quantity, and the dimension of the freight with declared value of each item that is being carried. You can add as many as freight items.
If you have multiple shippers or consignees, you will be able to enter the item per each location.
Additionally you can mention if the load type is Hazmat, Oversized Load, Reefer or Tanker.
Step 5: Enter how you would like to Charges for this load
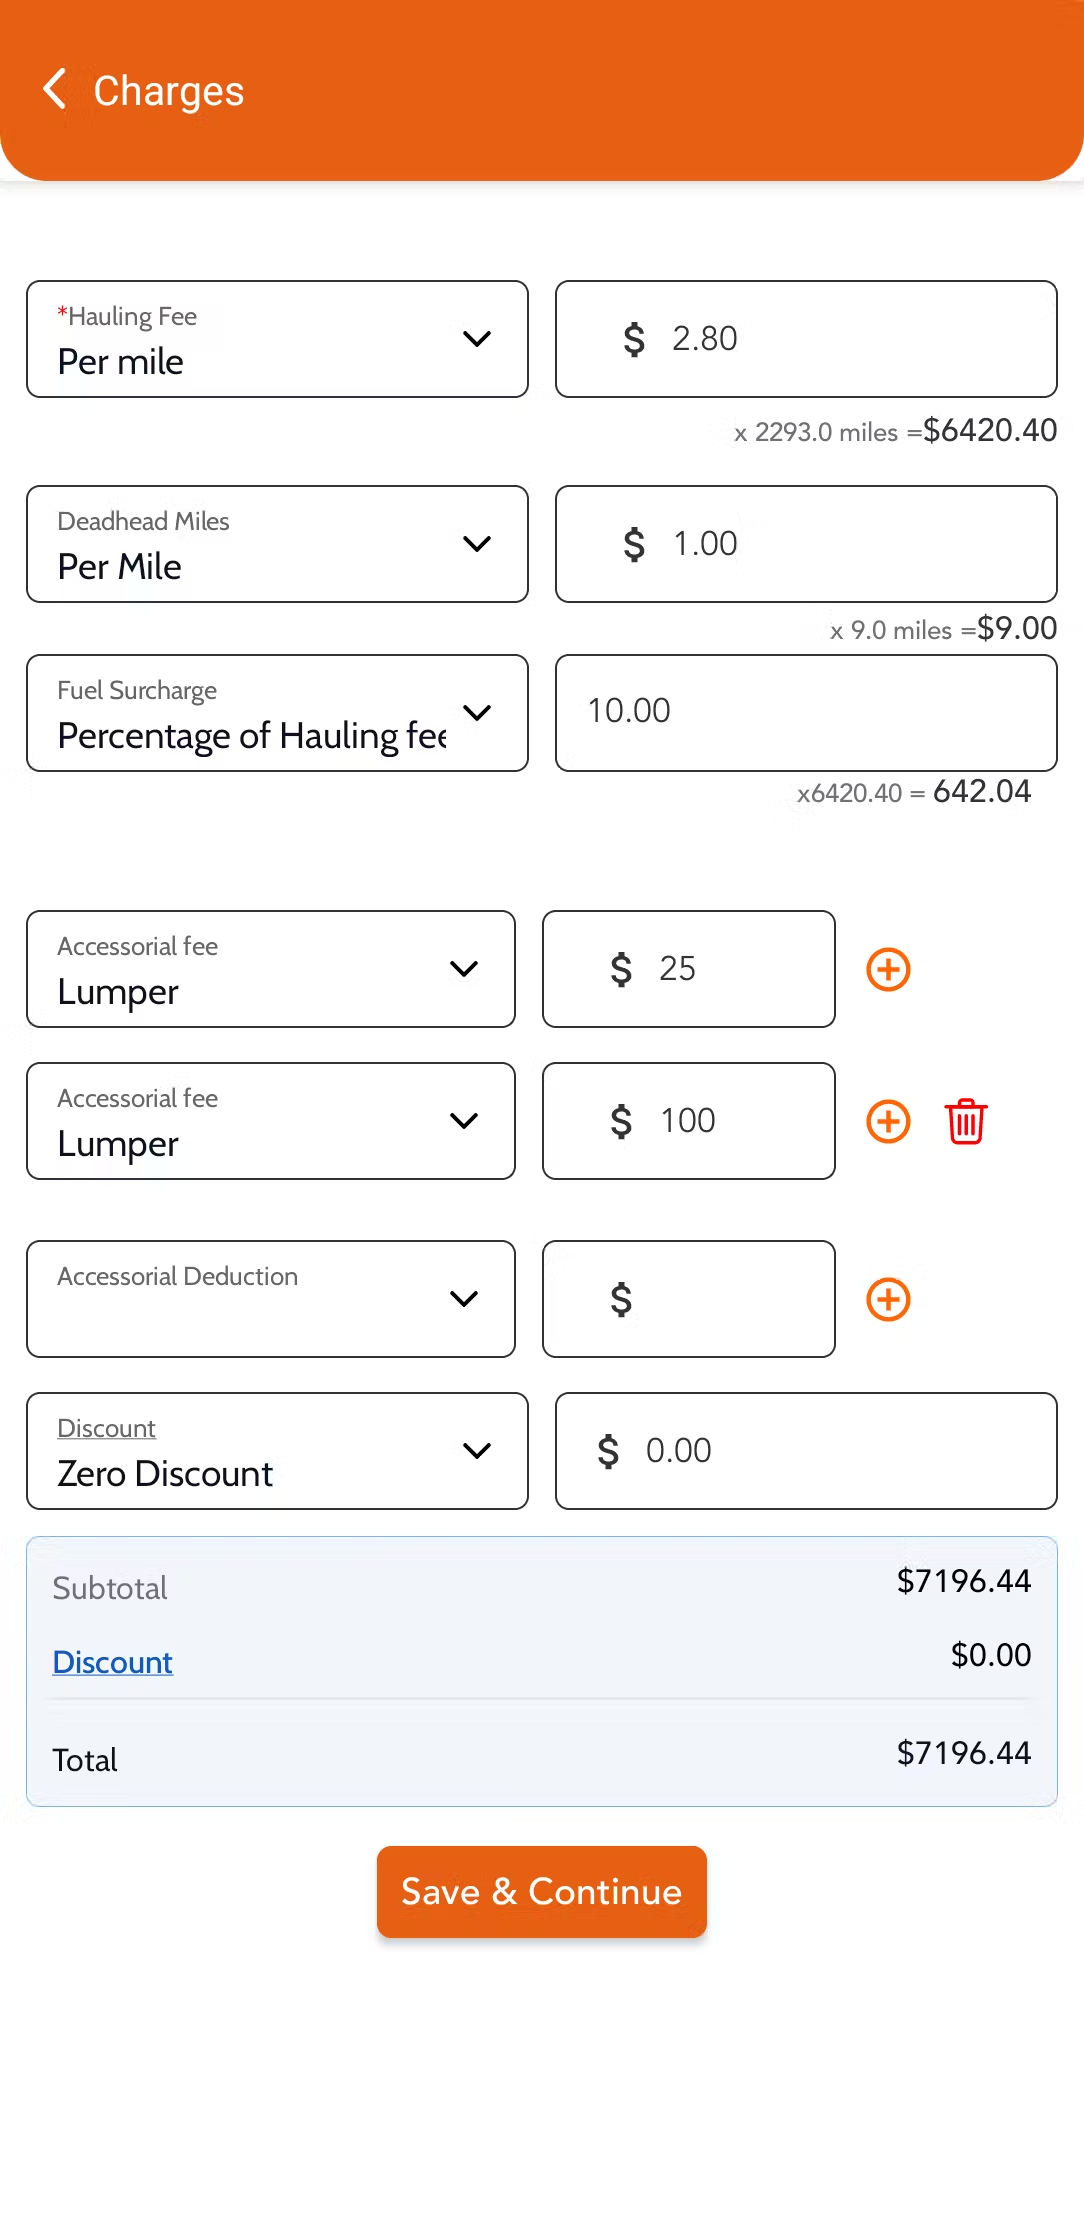
Select the Hauling fee, Deadhead Miles, Fuel Surcharge type and enter the rate associated for each.
- If you have entered the weight or miles, the total will be pulled for you and based on the rate you enter, the charges will be determined automatically.
Additionally you can add the Accessorial Fees and discounts if required.
Step 6: Preview Summary, and Create Load
Once you complete all the steps, you can preview each information added by clicking the preview icon, and make any changes if required, or continue to complete creating load by clicking the “Create Load” button.

Once the load is created, the load will be listed under Loads > Undispatched Status.
You can navigate to Dispatch and create dispatch for the load which you create here.
Check how to create a dispatch for the load using the mobile app.